

How To Set Up Customers In Quickbooks
Advertiser Disclosure: Our unbiased reviews and content are supported in role by affiliate partnerships, and we attach to strict guidelines to preserve editorial integrity.
One critical aspect of setting up your QuickBooks Pro accounts is adding contacts. Without contacts, you'll have no customers to invoice.
We already explained ane method of adding customers in our How to Import Customers Into QuickBooks Pro article, but you can also add customers manually.
Follow these simple steps to add together customers to QuickBooks.
Create A Contact
To add a customer in QuickBooks Pro, begin by going to Customers>Customer Center>New Customer & Job>New Customer.
Customer Information is divided into five sections: Address Info, Payment Settings, Sales Tax Settings, Boosted Info, and Job Info. The only department that is truly required is Address Information, just nosotros'll go over each. Nosotros've divided this mail to reflect these categories for easy navigation.
Step 1: Enter Contact'due south Name
Type your contact's proper name.
![]()
Step ii: Add An Opening Balance (optional)
You can add an opening balance for pre-existing customers.
![]()
If you add an opening balance, y'all'll also need to select the "every bit of" engagement. Y'all tin can click on the blue "How practise I make up one's mind an opening residuum?" link for more details.
Add Address Information
Step three: Enter The Company Proper noun
Add the visitor proper noun associated with your contact.
![]()
Step 4: Write Contact's Full Proper noun
Enter your contact'south full name and title.
![]()
Step 5: Add Contact'south Job Title
Fill in your contact's job championship.
![]()
Pace vi: Record Contact Details
Use the drop-down menus to salve eight fields of contact details. You can choose to save the following contact information:
- Chief Telephone
- Home Phone
- Work Telephone
- Mobile
- Alt. Phone
- Alt. Mobile
- Principal Electronic mail
- CC Email
- Alt. Email 1
- Alt. Email 2
- Website
- URL 1
- URL 2
- URL three
- URL four
- Skype ID
- Other ane
- Other 2
- Other three

Step seven: Add A Billing Address
Edit your contact's address data.
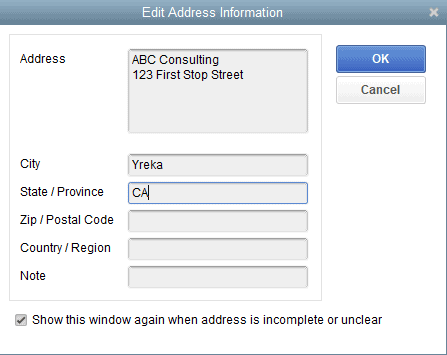
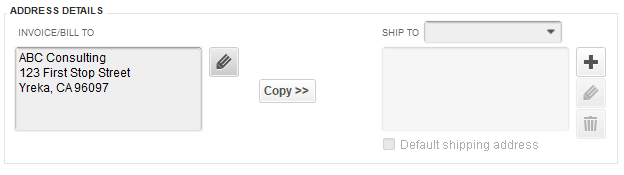
Step eight: Add A Aircraft Address
If your contact's shipping address is the same as their billing address, click "Re-create>>." If not, fill in the proper shipping address at present. Then click the bluish "OK" button.
Adjust Payment Settings
Footstep 9: Add An Account Number
Add an account number for your contact (if applicable).
![]()
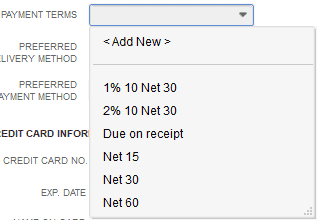
Step x: Select Default Payment Terms
Select the proper default terms for your client. These terms will announced on every estimate or invoice you transport to your customer (though the defaults can be overridden or changed at any time). You tin cull betwixt:
- one% 10 Internet 30
- two% ten net 30
- Due on Receipt
- Cyberspace xv
- Net 30
- Cyberspace sixty
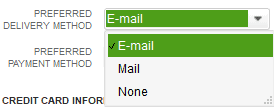
Step 11: Select A Preferred Delivery Method
Choose a preferred commitment method that volition be used when you transport estimates and invoices to your contact. Yous tin can choose between:
- Post
- None
Step 12: Set up A Credit Limit
Yous can set an optional credit limit for your customer if desired.
![]()
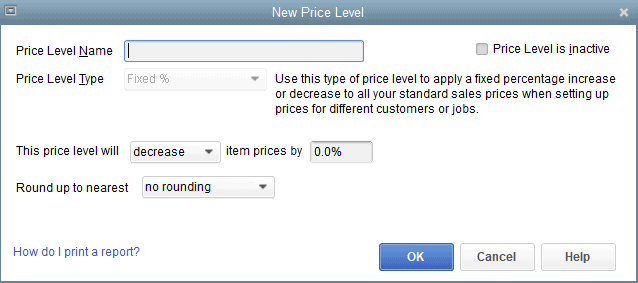
Step 13: Select A Toll Level
QuickBooks allows you to create price levels, which are basically a means of offering custom pricing for customers or jobs. You can add together one now or click the blue question mark to learn more almost this feature.
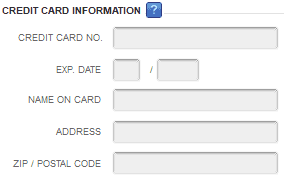
Footstep xiv: Record Contact's Credit Bill of fare Data
QuickBooks Pro gives you the option to save a contact's credit card information if desired. Yous can add the credit card number, expiration date, proper name on menu, address, and zip code.
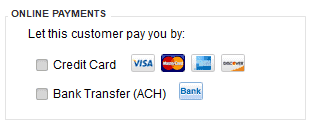
Stride 15: Enable Payments
You can opt to let your customers pay you via credit card or bank transfer. You'll demand to create a QuickBooks Payments account first. Once y'all've created an account, click the appropriate boxes for how you want your customer to pay (or come back and edit this later).
Edit Sales Revenue enhancement Settings
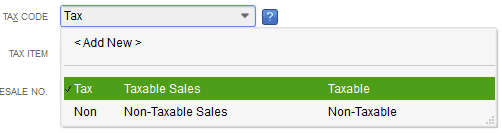
Step 16: Include A Customer Tax Lawmaking
In gild to save a default sales tax rate to your customer, you lot'll need to select "Revenue enhancement" from the Revenue enhancement Lawmaking drop-down carte. If you lot don't want to accuse sales revenue enhancement to this customer, select "Non."
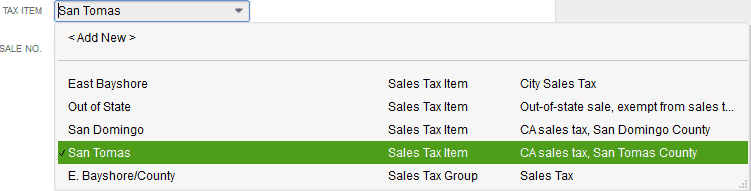
Step 17: Select A Default Sales Revenue enhancement
Select a default sales revenue enhancement to charge your customer (you can override the default when creating estimates and invoices).
Step 18: Add A Resale Number
You can choose to add together a resale number if y'all'd like.
![]()
Add together Additional Info
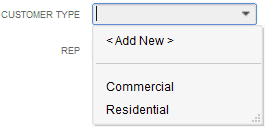
Step 19: Specify A Customer Type
Utilise the drop-down menu to note where this customer came from. You tin can choose a pre-made selection or add together your own.
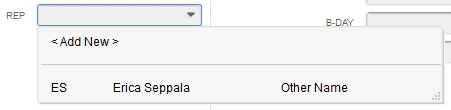
Step xx: Link To A Sales Rep
If you want to link this client to a specific sales representative, choose the appropriate employee using the drop-downward menu.
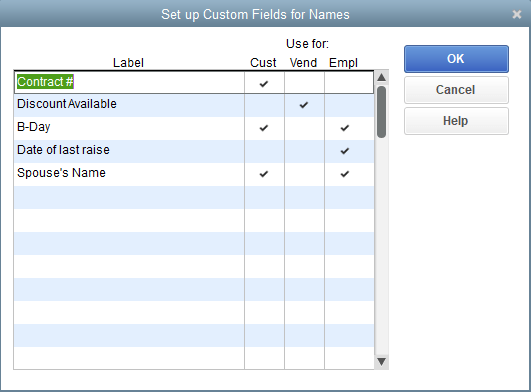
Step 21: Create Custom Fields
Y'all can create a custom field for your contact. Click the "Define Fields" button in the lesser right-manus corner of the screen. And so write a label for your custom field and select whether that custom field applies to customers, vendors, or employees.
Record Chore Info
Step 22: Enter A Job Description
Add a chore clarification for the projection fastened to your customer.
![]()
Pace 23: Choose A Task Type
Choose the chore blazon or add your own by selecting Add New.

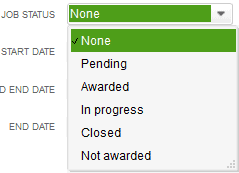
Pace 24: Set A Job Condition
Set a current status for this project. You can choose betwixt:
- None
- Pending
- Awarded
- In progress
- Airtight
- Non awarded
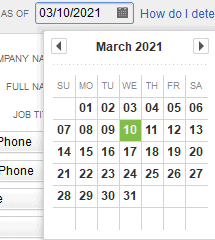
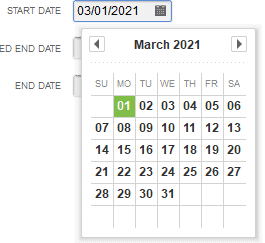
Step 25: Mark The Offset Date, Projected End Engagement, & End Date
Use the calendars to set a project start date, projected terminate date, and cease date (if bachelor).
Stride 26: Salvage The Contact
Finally, y'all tin can relieve your contact by clicking the blueish "OK" button on the bottom of the screen.
![]()
Y'all can view your customer list or go back to the Customer Center to make sure the customer saved correctly. Repeat this process as many times as needed until all of your customers are successfully added to your QuickBooks account.
If you lot take whatsoever troubleshooting issues, check out the QuickBooks Customs or call QuickBooks straight. Don't forget to check out the rest of our QuickBooks Desktop Pro 101 Serial to acquire how to import customers, add employees, create an invoice, and more than.
Overwhelmed by QuickBooks Pro? Maybe it'south time to switch to QuickBooks Online. QBO is like shooting fish in a barrel to use, cloud-based, and affordable. Best of all, you can easily import your QuickBooks Desktop data into QuickBooks Online. Check out our full review on QuickBooks Online for more details.
Outgrown QuickBooks Pro? Switch to QuickBooks Premier. It's the same QuickBooks Desktop software you dearest but with more than users and advanced, industry-specific features, which we cover in our QuickBooks Premier review.
Source: https://www.merchantmaverick.com/how-to-add-customers-in-quickbooks-pro/
0 Response to "How To Set Up Customers In Quickbooks"
Post a Comment